If you haven't seen Part I and would like to, please take a look here.

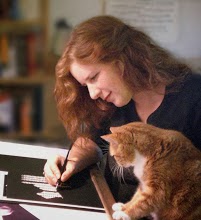
The next stages of the process are more fun to look at than to elaborate on. Basically, with the underpainting done we start a looooong series of layers of scratching, painting, scratching, painting. The scratching starts with the darkest areas - individual hairs and details are scratched, then a thin layer of ink applied to color the scratches (though not as dark as the underlying painting), once that is dry further details are scratched. Kind of like reverse Ukranian Easter eggs!

As we continue on I get to work on my favorite areas - the eyes/nose/muzzle. My favorite in general because this is where the personality and expression is. The eye received at least 5 layers of ink and scratching.


Because of the flash in this photo there was no reference detail available for her forward foreleg (photos with flash are never good as art references, but this one had enough other positives that I wanted to use it anyway). To compensate for this I've added some shading and approximated the hair directions - it's not ideal but the best I could do with the material I have.

And a surprising development.. my overall favorite part of this piece ended up being the claws! To think I was dreading them when I started it... they looked difficult to do (both from a textural and a color standpoint). It seems in every piece there's one bit that is my favorite - in the dachschund scratchboard it was his little toepads. Sometimes it's an eye or an ear. In this one.. the jagged claws with long quicks that we could only trim back so far and grew like weeds!!

And after about a month of scratching and inking and scratching and inking we end up with a finished portrait!!

"Rosie" Ink on Whiteboard, 2009 (c) Pam Boutilier
I hope you've enjoyed this little foray into a new medium! Having seen some examples of my pastels, (black) scratchboard and now whiteboard which ones do you like the most? Leave a comment with your thoughts!
~ Pam


2 comments:
What kind of texture does the whole process create on the finished piece? I imagine it's nicely rough.
Interestingly, if you look at the closeups of the eye and reverse it, it looks like a very angry little eye....
Well - technically it *should* be pretty smooth (You are supposed to avoid goudging the clay layer) ... but mine does have a rough-ish texture, especially in the most white bits. The fixative spray that goes on after smooths it out a bit though.
And about the closeup... are you sure you didn't meet Rosie? I think you have some insight into the 'other' Rosie that one does not blog about!
Post a Comment