Sunday, June 21, 2009

Rosie - Adventures in Whiteboard (Part II)

Welcome back!
If you haven't seen Part I and would like to, please take a look here.


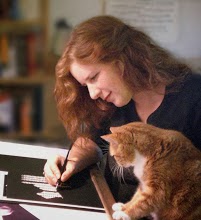
The next stages of the process are more fun to look at than to elaborate on. Basically, with the underpainting done we start a looooong series of layers of scratching, painting, scratching, painting. The scratching starts with the darkest areas - individual hairs and details are scratched, then a thin layer of ink applied to color the scratches (though not as dark as the underlying painting), once that is dry further details are scratched. Kind of like reverse Ukranian Easter eggs!


As we continue on I get to work on my favorite areas - the eyes/nose/muzzle. My favorite in general because this is where the personality and expression is. The eye received at least 5 layers of ink and scratching.


Because of the flash in this photo there was no reference detail available for her forward foreleg (photos with flash are never good as art references, but this one had enough other positives that I wanted to use it anyway). To compensate for this I've added some shading and approximated the hair directions - it's not ideal but the best I could do with the material I have.


And a surprising development.. my overall favorite part of this piece ended up being the claws! To think I was dreading them when I started it... they looked difficult to do (both from a textural and a color standpoint). It seems in every piece there's one bit that is my favorite - in the dachschund scratchboard it was his little toepads. Sometimes it's an eye or an ear. In this one.. the jagged claws with long quicks that we could only trim back so far and grew like weeds!!


And after about a month of scratching and inking and scratching and inking we end up with a finished portrait!!


"Rosie" Ink on Whiteboard, 2009 (c) Pam Boutilier

I hope you've enjoyed this little foray into a new medium! Having seen some examples of my pastels, (black) scratchboard and now whiteboard which ones do you like the most? Leave a comment with your thoughts!

~ Pam

Tuesday, June 16, 2009

Rosie - Adventures in Whiteboard (Part I)

Last time I alluded to the fact that I'm working on a new technique. I've completed a couple more scratchboards (and find that each one teaches me something more.. my scratching technique continues to improve).

But sometimes a gal just needs color.

Now there are two ways to do color with scratchboard - one is to start with the standard black scratchboard as you've seen in previous posts, and to apply washes of color (generally with ink, acrylic, or other media). To prepare for this one must 'overscratch' the board, basically scratching off a bit more of the black than you would if it were going to remain black and white. After the colour washes you scratch more, and continue alternating until you get the effect you're going for. Ending up with something like this:


'Mother's Arms' 9x12 Ampersand Scratchboard (c) Pam Boutilier 2009

The other way is to use whiteboards. A whiteboard (WB) is the same as a standard scratchboard (SB) but does not have the india ink layer on the top - it's just white clay and very smooth. Before scratching you must apply your surface medium and this allows you to play with colour! Many media can be used - ink, paint, coloured pencil... the effect is slightly different for each.

If you want to see some amazing scratchboard and some very good instructive information please check out Diana Lee's website: www.dianalee.com or better yet check out some of her posts on www.WetCanvas.com (which is where I'm learning all of this from)!

Following is my first attempt at a whiteboard - this is done on a 6x6" WB using inks in the form of Inktense Pencils (by Derwent) and Liquid ink (Ampersand). I really like the deep, vibrant colour achieved with inks - though the colour range isn't as dynamic as you can achieve with coloured pencil. My biggest frustration with the Inktense pencils is that, because they are water soluble, the ink is never fully permanent - so it is difficult to go back and do new layers without mobilizing some of the earlier ink and blunting your scratching efforts.


'Emma' 6x6 Ampersand Claybord (c) Pam Boutilier 2009

After my practice piece I was ready to jump in so next I tacked a 9x12" WB - only this time I chose a reference photo that I thought I could work with. The Emma photo was not really detailed enough for scratchboard, but was perfect for practice. For board #2 I chose this old photo of my girl, Rosie:


As always it starts with a sketch;


I decided to crop it close and change the position of her eye a little to better reflect her personality. Rosie was my dog - an English Bulldog rescue. We had 10 years together before she passed away in 2006 from complication of lymphoma. That's a pretty good age for a bulldog - and she got to boss lots of folks around in her ten years!


Next is applying the ink - after my experience with the pencils I decided to go with all liquid ink (Ampersand ink). Thanks to a wonderful oil painting class I took a couple of years back I feel pretty comfortable with colour mixing - which is good when you only have yellow, blue, green, magenta, black and sepia to work with!


At this stage it reminds me of pop-art.. but remember, the ink will be scratched through so this base layer has to be very deep and dark if you want real depth in the final image - it seems I actually learned quite a bit from that little practice piece above!

Next time I'll post some further stages and the finished product.

~ Pam

Tuesday, June 9, 2009

Scout - a tribute

Some of my favorite pieces are memorials of dear friends we have lost. Scout passed away unexpectedly last fall - below is Scout's portrait on scratchboard and a wonderful write-up from her owner.

~ Pam ~


Sometimes you don’t love a pet for what the pet can do for you. Scout came to us at age 8 from a very devoted family who was moving to England. They wouldn’t consider selling their house and four cars, or finding a place in London, until they had settled their Scout in an ‘acceptable’ new family. The family left us a long list of instructions for her proper care—none of which seemed to apply to the doggie we came to love for her own goofy self. I loved the notch a Westie took out of her ear when she was just a new puppy, and I loved that she got me to go walking when it would have been easier to be a couch potato. I laughed at how devoted she was to me when I was dealing with food. None of us loved the stentorian snores or eye-watering flatulence. We appreciated that dropped food never made it to the floor, but we could have done without the smiling drooling face that watched us eat every bite on our plates. Above all, we loved that sweet, sober—sometimes smiling—face and the dear beast who relied on us to love her just for being who she was. I hope we really were ‘acceptable’.

~ Scout's 'mom'