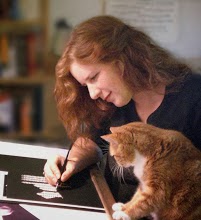
I thought I'd share this little fellow with you - the reference picture was given by Sue (a
WetCanvas member) and I just loved the expression and pose on this little guy!
I started with a pencil sketch:

I didn't quite capture his expression here, but it was a good practice to help me sort out the values and to figure out where I'd gone wrong. The lighting in this shot makes it perfect for a dramatic scratchboard so I started him on a 5 x 7" Ampersand Scratchboard.
First the transfer paper sketch:

Unlike the mousie, for this one I went over the transferred lines with very faint scratches to indicate where they were. This allowed me to erase the transfer and still have my guides and proportions. I like this method better as I get distracted by the bold, yellow lines when I'm working on other areas. The marks are too faint to show up on a scan, so let's jump ahead to the first WIP shot.
Of all the parts of a dog the one I'm most apt to mess up is the nose - so this time I decided to start there. The angle, texture and relationship to the lips were my primary focus at this time. You can see a little bit of my guidelines and, of course, I tend to wander away from my primary focus from time to time (hey, I can't work *just* on the nose, when that perfect, little right ear is sitting right there!):

Continuing along the head - trying to work around the outside but also keeping my internal proportions right. It's so easy to get lost in the play along the side of the face, I love that area just below the eye where you have the zygomatic arch and the loose flesh of the cheek laying over it then corner of the lips and that little mole-thing dogs have. Usually I put the eyes in early on, in this case I really wanted the eye position and shape, but saved the highlights for later (because they're fun!):

I got a bit carried away and didn't scan for a bit. At this point I have gotten the basic body outline done and started on that wonderful little paw. The paws are what makes this shot so intimate, not just another posed portrait - he's right up there checking out what's going on! Another favorite bit of mine was the shadow cast by his ear just above his left paw (it will come out more as the hair around that area is done):

Now it's cooking - I've got the ear laid in and the other paw mostly done. This is about the end of the scratching portion and you may notice some areas are a little overscratched. This is where I go back and lay in some ink washes to tone down some of the scratched areas, also to ink out any of my original guidelines that are still showing and to tweak any errors.

And voila! Finis!

I hope you liked my little Dachshund, stay tuned for my next post!


